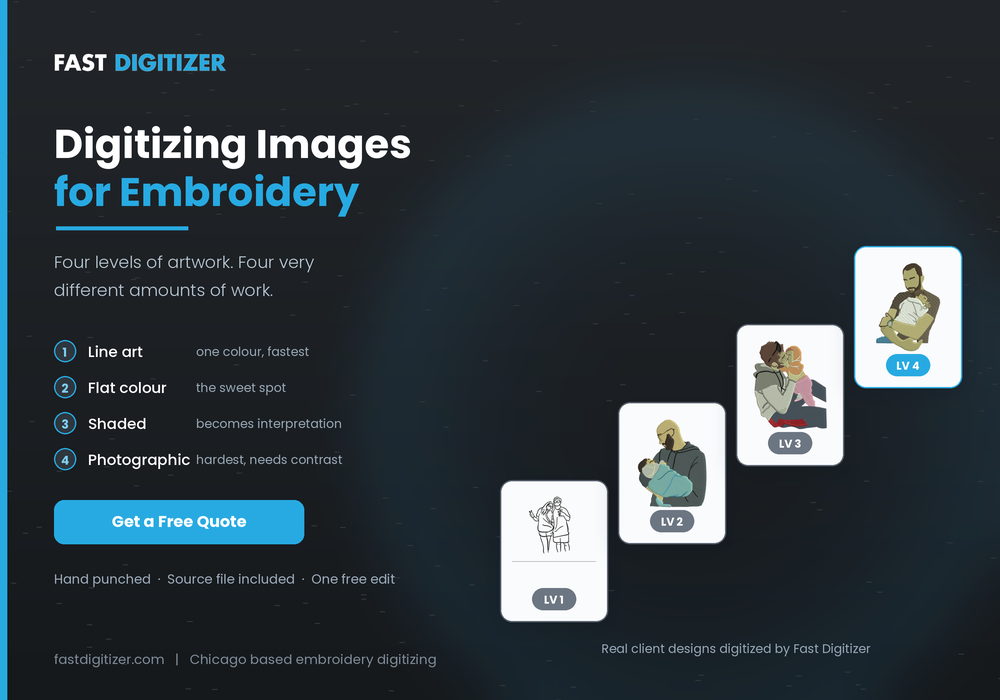
Digitizing images for embroidery is not one job with one price. A bold two colour outline and a softly lit portrait may open in the same software, yet they demand completely different amounts of work, thread and judgement. Understanding which category your artwork falls into tells you what it will cost, how long it will take, and which details you are about to lose.
What Digitizing Images for Embroidery Actually Involves
Essentially, an image stores colour values. An embroidery file stores needle movements, thread changes and stitch angles. Since neither format contains the other, a person rebuilds the artwork shape by shape and decides how thread should behave on the fabric you named.
Three decisions dominate the work. First, which shapes survive at your finished size. Second, how many thread colours the design carries. Third, what stitch type each area receives, because satin, fill and running stitches all catch light differently and all have their own limits.
Not All Images Are Equally Hard to Digitize for Embroidery
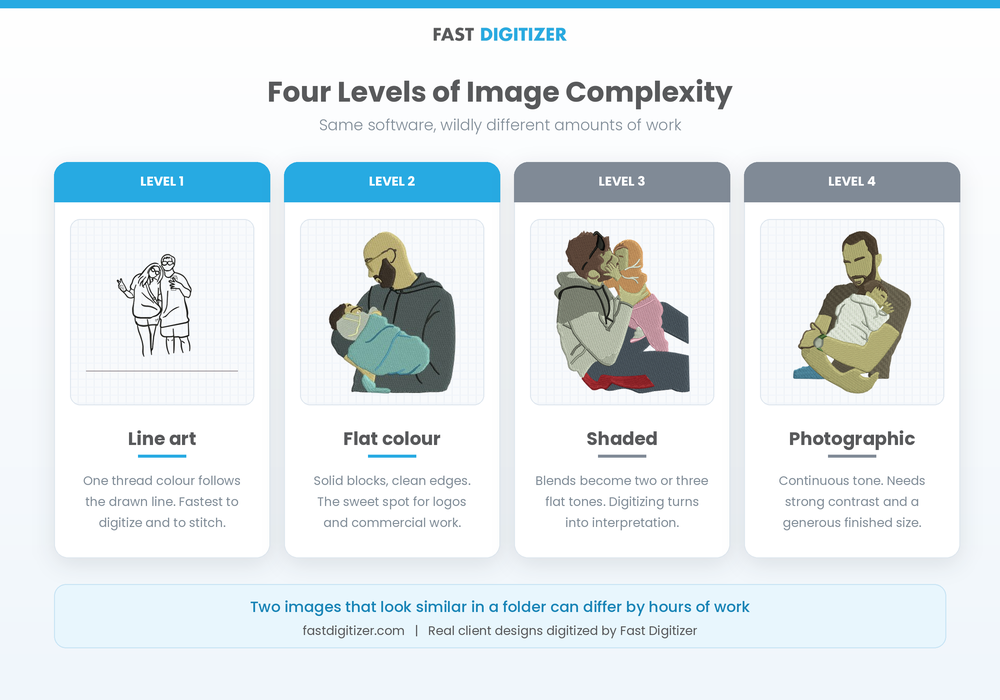
Here is where most quotes go wrong. Two images that look similar in a folder can differ by hours of work, so it helps to place your artwork on a rough ladder before asking anyone for a price.
Level one: line art and single colour outlines
Firstly, pure outline artwork is the fastest category. A single thread colour follows the drawn lines as satin columns or running stitches, and no fill areas exist at all. Because there is nothing to blend, the main decision is line weight, since anything drawn thinner than roughly 1 mm needs widening before it will stitch.
Similarly, these designs stitch quickly on the machine, which keeps production costs down on larger runs.
Level two: flat colour illustration
Meanwhile, flat artwork uses solid blocks with clean boundaries and no shading. This is the sweet spot for embroidery, and it is why so many logos translate well. Each colour becomes a fill or satin area, edges stay crisp, and stitch counts stay predictable.
Most commercial work sits here. Consequently, quotes for this category tend to be the most consistent across providers.
Level three: shaded and blended illustration
However, once artwork carries soft shading, digitizing becomes interpretation. Thread cannot fade, so a smooth gradient gets rebuilt as two or three flat tones stacked against each other, or as a blended fill that alternates two thread colours across an overlap zone.
For example, skin tones make this obvious. A face drawn with five subtle shades usually reduces to two or three in thread, and choosing which ones to keep changes the whole character of the finished piece.
Level four: photographs and portraits
Finally, photographs sit at the far end because they contain continuous tone rather than shapes. Digitizing a photo means throwing away most of the information deliberately and rebuilding the subject from a limited palette.
Notably, results depend on contrast more than resolution. A strongly lit subject against a plain background can work beautifully, whereas a softly lit portrait with gentle shadows rarely survives. In most cases a simplified illustration of the same subject produces a better garment than a literal photo attempt.
Assessing Your Image Before Digitizing It for Embroidery
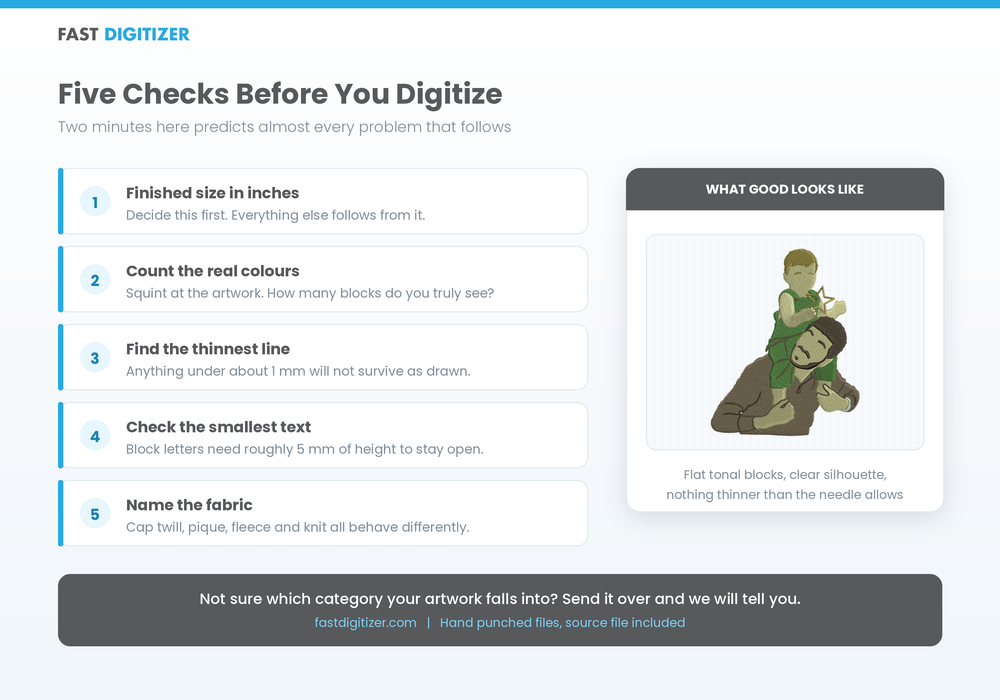
Fortunately, five checks take about two minutes and predict almost every problem that follows.
- Count the real colours. Squint at the artwork and count distinct areas, not shades. Six to eight is comfortable, and every extra colour adds a machine stop.
- Find the thinnest line. Measure it against the finished size in inches. Anything under 1 mm at final scale gets widened, merged or removed.
- Read the smallest text aloud. Block lettering under roughly 5 mm tall closes up once thread thickness enters the picture.
- Look for gradients. Every soft transition becomes a decision about how many flat tones replace it.
- Check the edges at full zoom. Crisp boundaries digitize cleanly, while blurry ones force the digitizer to guess where the line truly sits.
Above all, decide the finished size before anything else. A design that works at four inches may lose its entire face at two.
Colour Reduction: The Step Nobody Talks About
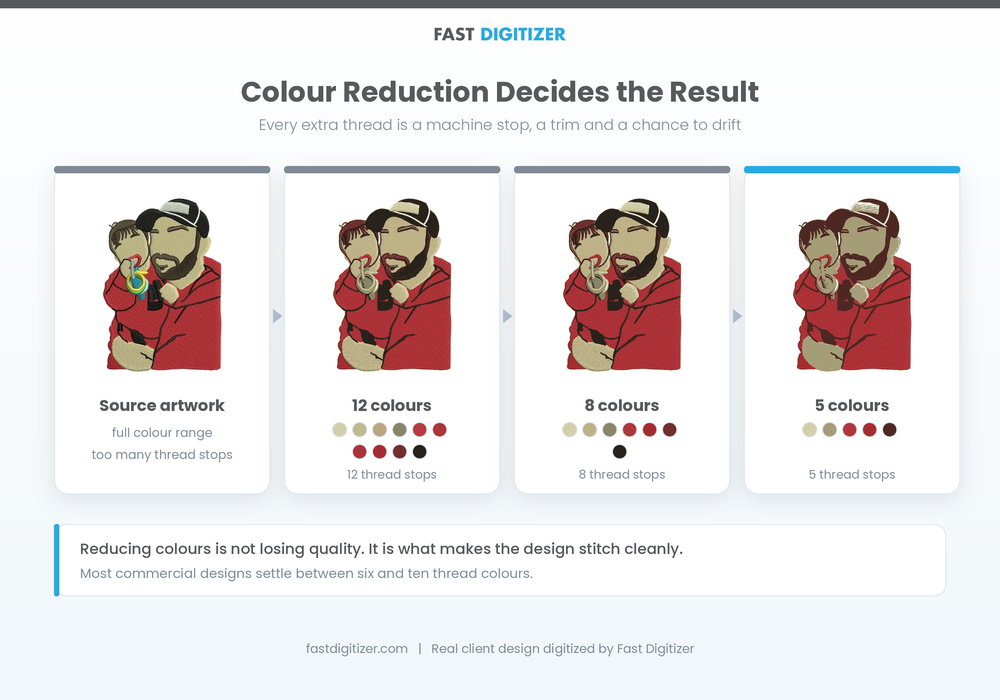
Above all, colour reduction does more for the final result than any other single step, yet it happens before a single stitch gets planned. The goal is not simply fewer colours. Instead, it is choosing which colours carry the design’s meaning.
For instance, take a character illustration with a face, hair, clothing and a background element. Reducing from twenty shades to seven means deciding that the hair keeps two tones, the face keeps two, and the clothing drops to one flat colour. Those choices define what the piece looks like far more than stitch settings do.
In addition, thread charts matter here too. Screen colours and thread colours never match exactly, so if brand colours are involved, supply the codes rather than hoping the match lands close enough.
Stitch Choices When Digitizing Images for Embroidery
Once the colours are settled, each area then receives a stitch type. The mapping is fairly consistent.
Satin suits borders, lettering and any bold shape between roughly 1 mm and 12 mm wide. Its long parallel stitches catch light, which is why outlines look glossy.
Fill covers larger areas using short stitches in offset rows. Changing the angle between adjacent fills creates visible separation without adding a colour, and this trick does a lot of work in shaded illustrations.
Running stitch handles thin detail, interior lines and travel between shapes. In line art especially, it keeps the design light rather than heavy with thread.
Meanwhile, underneath all of them sits underlay, a hidden layer that stabilises fabric before the visible stitches land. Knits move under the needle without it, which is how flat artwork ends up puckered.
Software for Digitizing Images for Embroidery
Generally, several tools handle this work, and they differ mainly in how much manual control they give you.
Ink/Stitch
Firstly, Ink/Stitch is free and open source, running as an extension inside Inkscape. It supports both tracing and genuine manual digitizing, which makes it the strongest no cost option available. Version 3.3.0 arrived on 31 July 2026, adding a cross stitch type with a setup assistant, new lettering fonts, and easier even width satin columns.
SewArt
Meanwhile, SewArt from S&S Computing focuses on turning images into stitch files. It costs around $75, runs on Windows, and offers a free thirty day demo. Its colour reduction tools deserve attention, since that step matters more than the tracing itself.
Professional packages
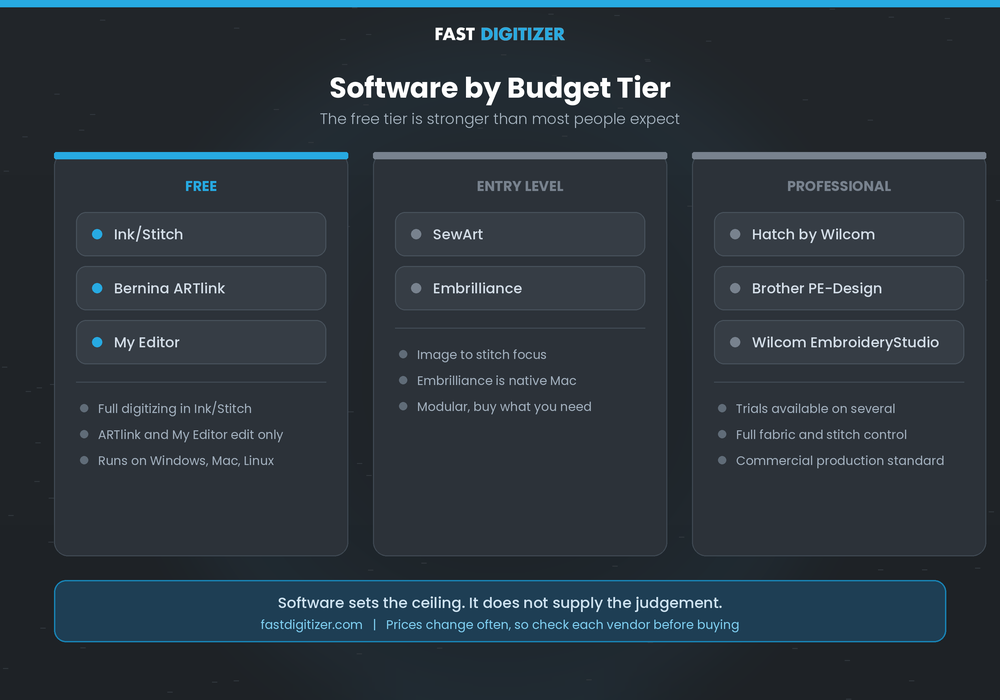
At the professional end, Wilcom EmbroideryStudio is treated as the standard, while Hatch by Wilcom and Embrilliance suit smaller shops. Hatch offers a thirty day trial and Brother PE-Design has a trial version too. Full licences run from hundreds to thousands of dollars, so they make sense once you digitize regularly.
Free editors
Finally, Bernina ARTlink and My Editor cost nothing, although they edit and convert existing stitch files rather than creating them from images. They are useful after digitizing, not instead of it.
What Digitizing Images for Embroidery Costs
Typically, professional digitizing for a standard design runs between $10 and $40 in the United States. However, the complexity ladder explains the spread. Line art and flat logos sit at the lower end, shaded illustrations climb, and portrait work costs considerably more because the interpretation takes real time.
Two pricing models exist. Per design gives you one fixed number agreed before work starts. Per thousand stitches scales with size, which suits large simple designs and penalises small dense ones. Neither is wrong, although knowing which you agreed to prevents surprises.
For comparison, at Fast Digitizer cap and left chest designs start at $9, and we quote a fixed price before beginning rather than calculating from the finished stitch count. The source file comes with every order, so future resizes stay possible.
Mistakes That Waste the Most Time When Digitizing Images
In practice, four errors account for most rework, and all four happen before stitching begins.
Choosing the size last. Everything depends on the finished dimensions, so deciding them afterwards means rebuilding the design.
Keeping every detail. Simplification is a skill rather than a compromise, and refusing to simplify guarantees a muddy sewout.
Judging from the screen preview. Previews hide puckering, registration drift and closed lettering completely. Only fabric tells the truth.
Ignoring the fabric. The same file behaves differently on structured twill and performance knit, so density and underlay must suit the garment.
FAQs About Digitizing Images for Embroidery
How can I digitize an image for embroidery?
First, open the artwork in digitizing software, then set the finished size in inches, reduce the colours to a workable number, assign satin, fill or running stitches to each shape, add underlay suited to the fabric, then export in your machine format. Finally, test sew before production.
How much does it cost to digitize an image for embroidery?
Generally, most standard designs cost between $10 and $40 in the United States, although the figure depends heavily on complexity. Line art and flat logos sit at the lower end, while shaded illustrations and portraits cost more. Some providers price per thousand stitches instead.
Is there a free digitizing software for embroidery?
Yes. Ink/Stitch is completely free and open source, and it handles both tracing and manual digitizing. SewArt offers a thirty day demo, while Hatch and Brother PE-Design both provide trial versions. Bernina ARTlink is free too, though it edits rather than digitizes.
What software can I use to digitize my embroidery designs?
For commercial work, Wilcom EmbroideryStudio is the professional standard. Hatch by Wilcom and Embrilliance suit smaller shops and home users, SewArt targets image conversion specifically, and Ink/Stitch remains the strongest free option across Windows, Mac and Linux.
Can any image be digitized for embroidery?
Technically yes, although not every image produces a good result. Line art and flat illustration translate easily, whereas photographs need heavy simplification and often disappoint. Assessing the artwork honestly beforehand saves both money and disappointment.
How long does digitizing an image take?
Typically a simple logo is ready the same working day, while shaded illustrations take longer and portrait work longer still. Complexity matters far more than file size, so a small busy design can take longer than a large simple one.
Does a bigger image file give better results?
Higher resolution helps, although clarity matters more than size. A sharp 1000 pixel image beats a blurry 4000 pixel one, and a vector file beats both because it carries no compression artifacts at all.
Choosing the Right Approach to Digitizing Images for Embroidery
Digitizing images for embroidery rewards honest assessment more than clever software. Place your artwork on the complexity ladder, set the finished size first, accept that colours will reduce and gradients will flatten, and test sew on the fabric you actually plan to use. Doing that turns a guessing game into a predictable process.