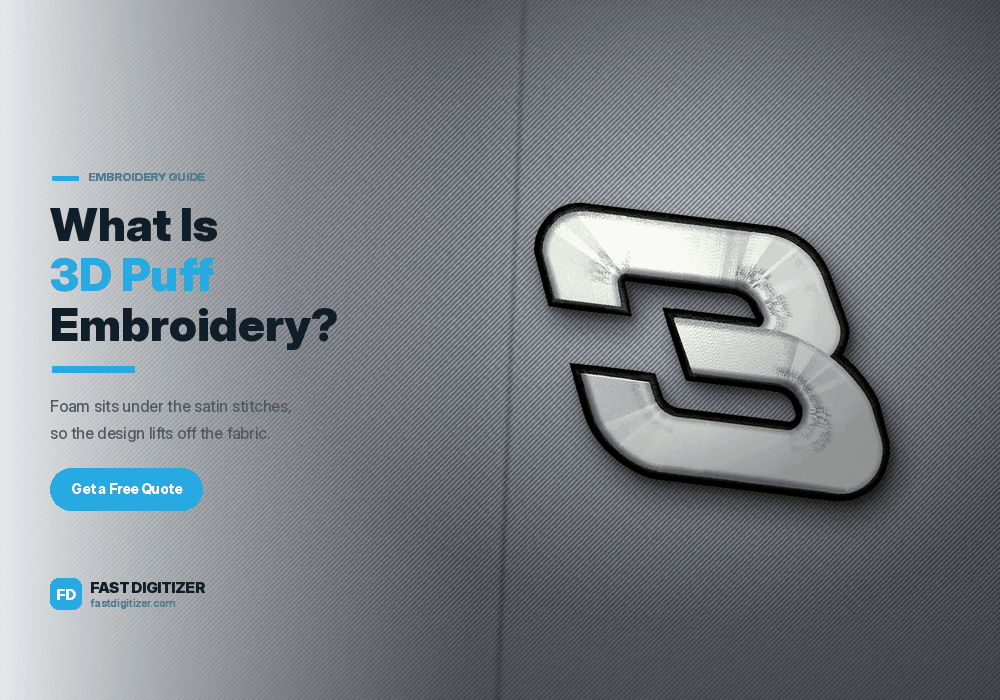
3D puff embroidery is the technique behind those bold, raised letters you see on team caps and streetwear. A layer of foam sits under the stitching, and the satin stitches wrap over that foam instead of lying flat. As a result the design gains real height that you can feel with a fingertip.
Quick answer
3D puff embroidery places a sheet of embroidery foam between the garment and the stitches. High density satin columns cut through the foam along the design edges and wrap over the top, so the shape rises off the surface. The operator then tears the leftover foam away.
What Is 3D Puff Embroidery?
3D puff embroidery is a raised embroidery technique that uses a foam underlay to lift a design above the fabric. Digitizers also call it puff embroidery or foam embroidery. The foam is not decoration in itself, because it disappears completely once the excess gets torn away. It simply acts as a form that the thread wraps around.
The effect works best on bold block lettering and simple logos, which is why you see it most on structured caps, varsity jackets and team merchandise. Regular embroidery lies flat no matter how dense you make it. Therefore 3D puff embroidery remains the main way to add genuine physical height to a stitched design.
3D Puff Embroidery vs Flat Embroidery
The only structural difference is the foam. Flat embroidery lays thread directly onto the fabric. 3D puff embroidery lays foam first, then covers it. However that one change affects the artwork you can use, the file you need and the garment you should stitch it on.
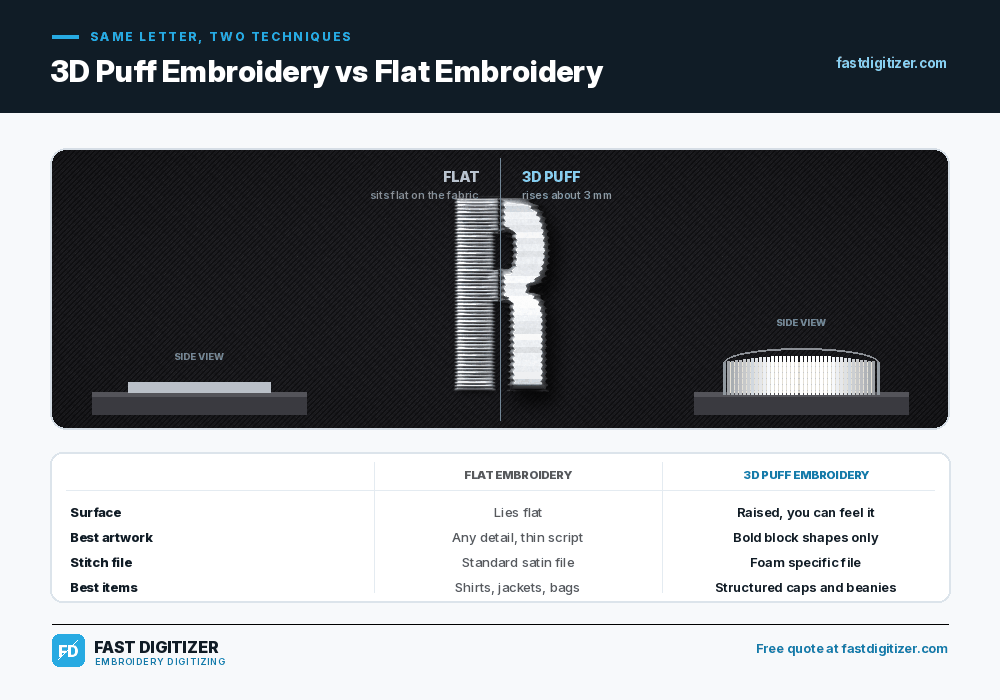
Flat embroidery handles almost any artwork, including thin script and small text. Puff cannot. Once foam adds height, fine detail either disappears or distorts. In addition, flat embroidery suits soft garments, while puff needs a firm surface underneath it so the foam does not collapse.
If your artwork has large solid shapes but you are not sure which method suits it, our guide on what applique embroidery is covers a third option that also fills big areas without a huge stitch count.
How Puff Embroidery Is Made Step by Step
Four things happen at the machine, and the file controls all of them. Miss any one and the foam either shows through the stitching or refuses to tear away cleanly. Here is the sequence a properly built file follows.
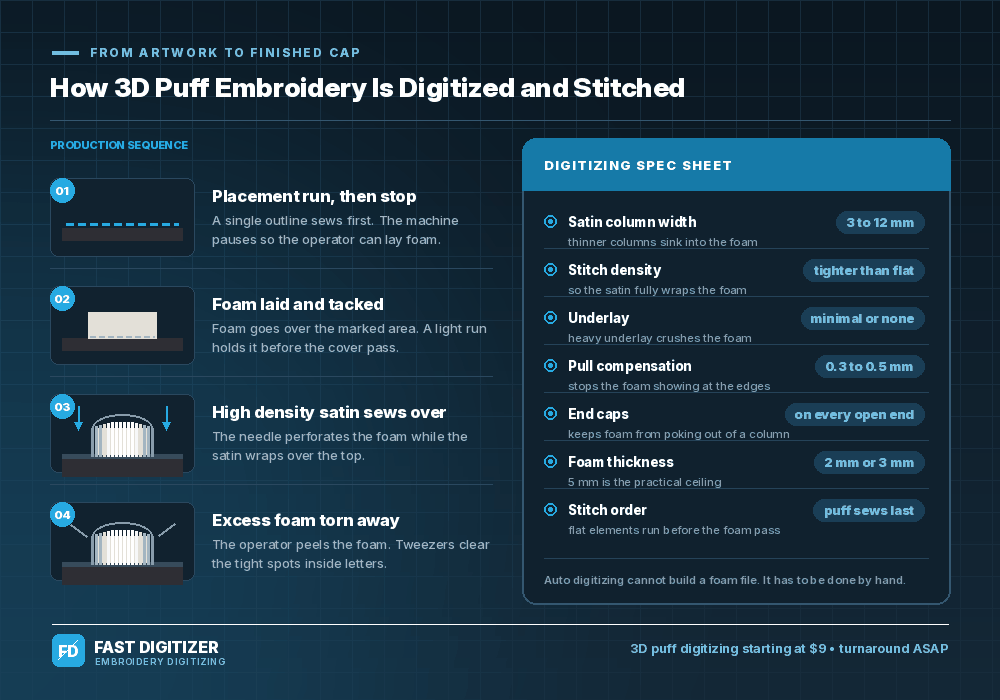
Step one: the placement run and the stop
The machine first sews a single outline that marks where the foam belongs. A stop command follows immediately, so the machine pauses and waits. Without that stop the operator has no chance to position anything, and the whole sequence falls apart.
Step two: the foam goes down
The operator lays a sheet of foam over the marked area, usually holding it with tape or a light spray adhesive so it cannot creep. A short tack down run then secures it. Above all, keep the foam slightly larger than the design on every side.
Step three: the satin pass
Now the high density satin columns run. Each needle penetration perforates the foam along the design boundary while the thread bridges over the top. Because the density is tighter than normal, those perforations effectively cut the foam into shape as the machine works.
Step four: removing the leftover foam
Once stitching finishes, the operator peels away the foam outside the design. Tweezers clear the tight spots inside letters, and stubborn fragments get tucked under the satin rather than pulled. Finally, a heat gun on a low setting shrinks any fine bits still showing, although this only works safely with polyester thread.
How to Digitize for 3D Puff Embroidery
A standard embroidery file does not work over foam. The stitch file needs its own density, its own underlay strategy and its own sequencing, or the design collapses. Auto digitizing cannot handle these variables, so every puff file gets built by hand.
The settings that matter most are these. Satin columns generally need to sit between roughly 3 mm and 12 mm wide, since anything thinner sinks into the foam instead of bridging it. Density goes tighter than flat work so the satin fully encases the foam edge. Underlay stays minimal, because heavy zigzag underlay compresses the foam before the top stitches can cap it.
Pull compensation usually increases to somewhere around 0.3 mm to 0.5 mm, since the foam creates lateral resistance as the thread tries to wrap over it. End caps are not optional either. Every open column end needs a short perpendicular bar to seal the foam inside, otherwise it pokes out at the tips of letters. Manufacturers publish their own parameters too, and Melco’s official 3D foam guidance is a useful cross check.
One more rule governs the whole file: the puff section always sews last. Any flat elements run first, then the machine stops for foam. The same sequencing discipline applies when you digitize a logo for embroidery in general, but puff is far less forgiving about it.
Which Designs Actually Work With Foam
Bold, blocky and simple wins every time. Varsity lettering, thick monograms, geometric marks and chunky brand initials all hold their shape under foam. Thin script, small text, fine outlines and photographic detail do not.
Use these rough guides when you look at your own artwork. Keep stroke thickness generous rather than delicate, and leave visible breathing room between separate raised elements so the foam does not merge them into one blob. Single colour designs generally puff more cleanly than busy multi colour ones.
If your logo carries too much detail, the practical fix is a simplified puff version rather than a compromise. Many brands run a bold puff mark on caps and keep the detailed version for flat stitching on shirts. Our team can prepare both from the same artwork, and our guide on digitizing images for embroidery explains what makes artwork easy or hard to convert.
Foam Thickness and Fabric Choice
Foam usually comes in 2 mm and 3 mm sheets, with thicker options available. Most professional work uses 3 mm, since it gives a clear lift without causing needle problems. Around 5 mm is the practical ceiling on most machines, because beyond that the needle shank sits inside the foam and traps the thread.
Match the foam colour to the thread colour as closely as you can. Any tiny gap in the satin then hides itself instead of flashing a contrasting stripe. That single habit prevents most visible foam complaints.
Fabric matters just as much. Structured caps, twill and canvas support puff properly. Thin, stretchy or slippery fabrics distort under the dense stitching and the raised effect ends up uneven. Puff also lives mostly on caps for a practical reason: caps rarely go through the wash, and foam does not enjoy repeated laundering.
Common 3D Puff Embroidery Mistakes
Most failed puff jobs come down to a handful of repeat offenders. Fortunately every one of them shows up on a single test sew, which is exactly why professionals never skip that step.
- Sending a flat file for a puff order. A standard satin file has no stop, no caps and the wrong density, so it stitches unevenly over foam.
- Using thin or detailed artwork. Narrow columns sink into the foam rather than bridging it, and the raised effect swallows small elements.
- Leaving open column ends uncapped. Foam then escapes at the tips of letters and no amount of cleanup hides it.
- Too much underlay. Heavy zigzag underlay flattens the foam before the cover stitches ever arrive.
- Yanking the leftover foam. Pulling hard distorts the stitching, so tuck small pieces under the satin with tweezers instead.
What 3D Puff Digitizing Costs
Pricing depends on the number of raised elements, the finished size and whether the design mixes flat and puff sections. A single word in block letters costs less than a layered crest with both techniques running in one file.
At Fast Digitizer, 3D puff digitizing starts at $9 and turnaround is ASAP. Every file ships with the stop commands, end caps and sequencing already built in, plus a production worksheet listing the foam thickness and thread colours we recommend. If you want the same logo prepared for shirts as well, our custom embroidery digitizing options cover that in the same order.
Want your logo raised?
Send us your artwork and we will tell you honestly whether it suits foam or stitches better flat.
Frequently Asked Questions
What are the key differences between 3D puff embroidery and flat embroidery?
Flat embroidery stitches directly onto fabric and stays level with the surface. 3D puff embroidery adds a foam layer underneath, so the design rises off the garment. Puff also needs bold artwork, a foam specific stitch file and a firm base such as a structured cap.
How do I digitize for 3D puff embroidery?
Build the file by hand with satin columns roughly 3 mm to 12 mm wide, tighter than normal density, minimal underlay and increased pull compensation. Add end caps on every open column end, insert a stop for foam placement, and sequence the puff section to sew last.
What are some examples of 3D puff embroidery designs?
Varsity block letters on caps, thick brand initials, sports team wordmarks, geometric logo marks and bold monograms are the classic examples. Streetwear labels use it heavily on trucker caps and beanies, since the raised finish reads clearly from a distance.
What is 3D embroidery?
3D embroidery is a broad term for any stitching that creates depth rather than a flat surface. Puff embroidery with foam is by far the most common form. Other approaches include raised patches and layered applique, which build height through fabric rather than foam.
About Fast Digitizer. We are an embroidery digitizing studio based in Chicago, building puff, cap, applique and logo files for embroiderers across the United States. Every file is manually digitized, test checked and delivered with a production worksheet. See our full range of professional embroidery digitizing services or send your artwork for a free quote.