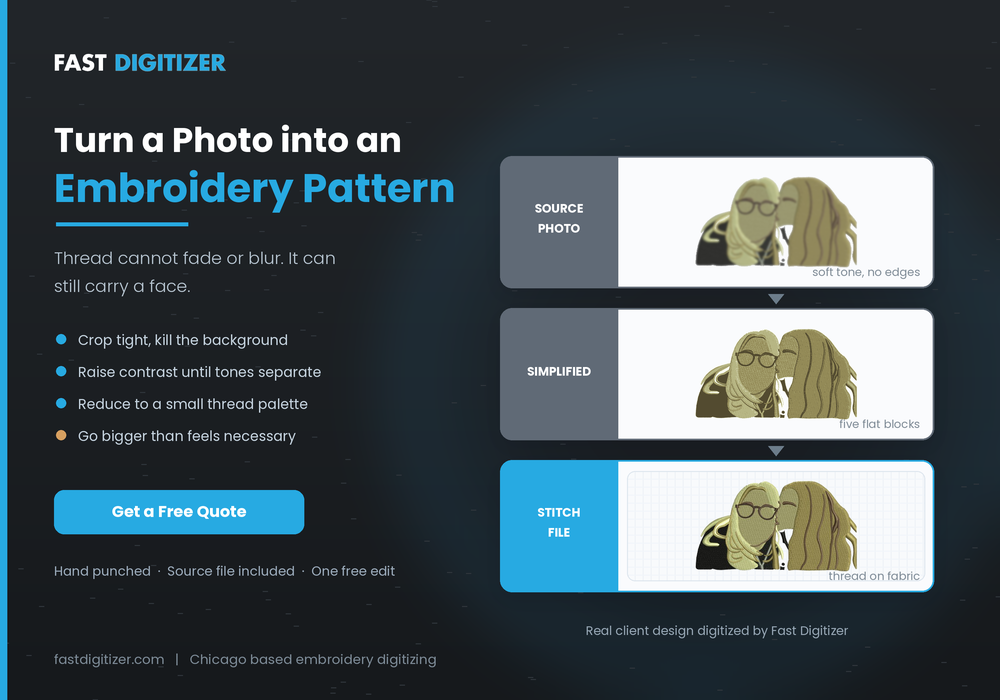
People usually want to turn a photo into an embroidery pattern for a reason that matters: a grandparent, a wedding, a child who grew up too fast. That emotional weight makes the technical side worth understanding, because thread cannot fade, blur or blend the way a camera sensor does. The photos that work are not always the ones you love most, and knowing the difference beforehand saves real disappointment.
Two Ways to Turn a Photo Into an Embroidery Pattern
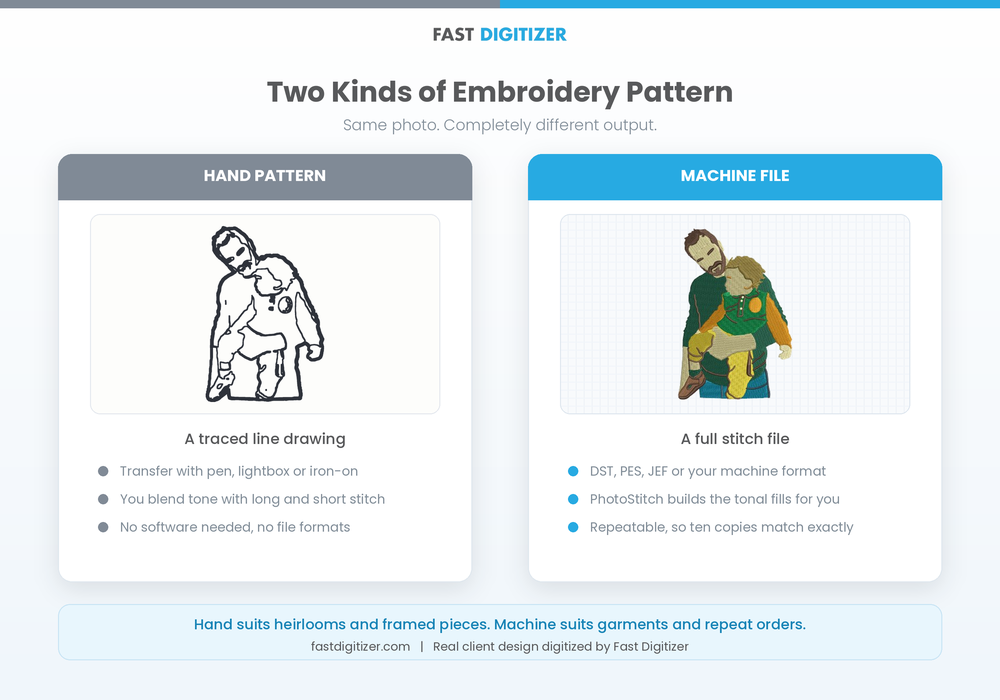
Before choosing tools, decide which kind of embroidery pattern you actually need, because the two paths share almost nothing beyond the starting photo.
A hand embroidery pattern is a line drawing you transfer onto fabric and stitch by hand. It captures shapes and edges rather than tone, and it stays a guide rather than an instruction set.
A machine embroidery file is a stitch file such as DST, PES or JEF, containing every needle movement. If your machine reads PES, our guide to the Brother PES file converter covers that format in detail. This is where PhotoStitch technology lives, and where tonal detail becomes possible.
Hand patterns suit heirloom projects, framed pieces and anyone who enjoys the process. Machine files suit garments, gifts at volume, and anything needing repeatable results.
Choosing a Photo That Will Actually Work as an Embroidery Pattern
Whether you turn a photo into an embroidery pattern by hand or by machine, this step decides more than software, editing or budget combined. Photographs sit at the hardest end of the scale when digitizing images for embroidery, so the choice of photo carries more weight than usual. Five qualities separate photos that stitch beautifully from photos that disappoint.
- Strong contrast. Thread reads tonal separation, not subtlety. A subject lit from one side beats flat overhead lighting every time.
- A clear edge around the subject. Hair against a dark background merges into a single mass once simplified.
- Few overlapping figures. Two faces work. A group of eight becomes a blur at any realistic size.
- Large facial area. If the face occupies a small fraction of the frame, expression disappears when scaled down.
- Simple background. Anything you would crop out anyway is detail the digitizer would have to remove.
Resolution matters less than most people assume. Consequently, a sharp phone photo taken in good light usually outperforms a large but poorly lit studio scan.
Preparing the Photo Before You Turn It Into an Embroidery Pattern
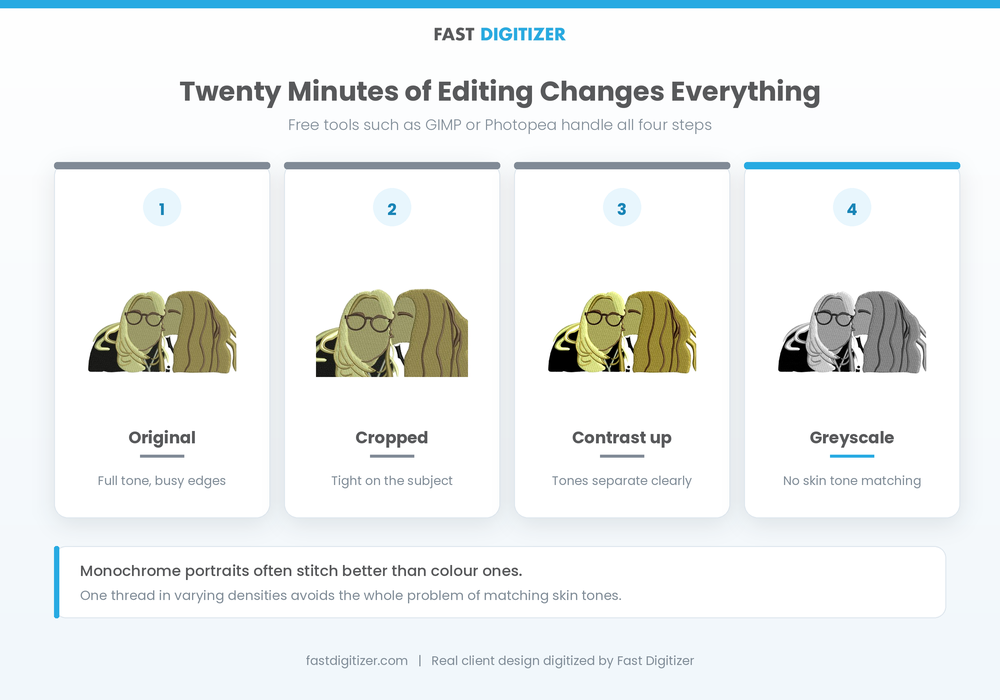
Twenty minutes of editing changes the outcome dramatically, and free tools such as GIMP or Photopea handle all of it.
Crop tightly. Move in on the subject and cut everything that does not contribute. A head and shoulders crop nearly always outperforms a full body shot.
Remove the background. A plain background lets the digitizer focus thread where it matters, and it also cuts stitch count considerably.
Raise contrast, then check the shadows. Push contrast until distinct tonal areas appear, yet stop before the dark regions merge into one flat shape.
Consider greyscale. Monochrome portraits often stitch better than colour ones, since a single thread in varying densities avoids the whole problem of matching skin tones.
PhotoStitch Tools That Turn a Photo Into an Embroidery Pattern
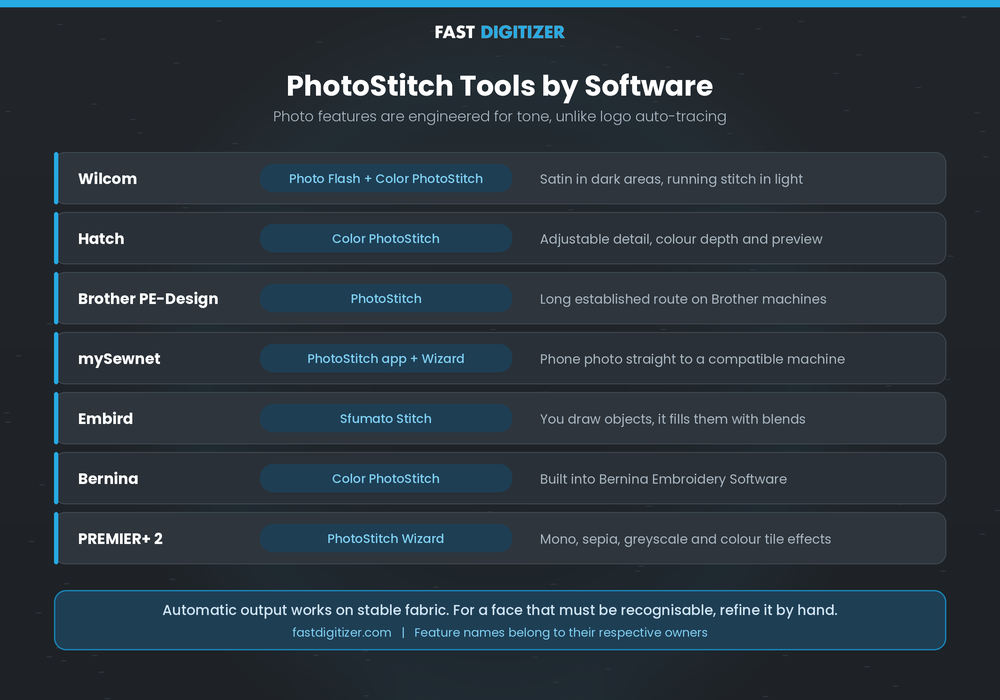
Most major embroidery software now includes a dedicated tool to turn a photo into an embroidery pattern automatically, and they work differently enough to matter.
Wilcom Photo Flash and Color PhotoStitch
Photo Flash converts black and white images by concentrating satin stitches in darker areas and thinning them to running stitches in lighter areas, which produces a striking monochrome effect. Color PhotoStitch handles multi colour photographs and creates an artistic stitch interpretation instead.
Hatch Color PhotoStitch
Hatch, made by Wilcom for home users, includes the same Color PhotoStitch approach with adjustable detail level, colour depth and stitch parameters. Its realistic preview matters here, because photo designs look very different on screen than as line art.
Brother PE-Design PhotoStitch
Brother builds PhotoStitch into PE-Design, and it remains one of the best known routes for home users on Brother machines. Design size limits vary by version, so check yours before planning a large piece.
mySewnet PhotoStitch
The mySewnet app includes a PhotoStitch feature that turns a photo taken on your phone into a design and sends it to a compatible machine or cloud account. Additionally, the desktop PhotoStitch Wizard offers several artistic styles on higher software tiers.
Embird Sfumato Stitch
Sfumato is Embird’s photo module, named after the Renaissance painting technique for soft tonal transitions. Rather than converting the whole image automatically, you draw shaped objects over the photo and the software fills them with blended stitches.
Bernina and PREMIER+ 2
Bernina Embroidery Software includes Color PhotoStitch, while PREMIER+ 2 PhotoStitch offers monochrome, sepia, greyscale and colour tile effects through a step by step wizard.
What Automatic PhotoStitch Does Well and Badly
Automatic photo tools genuinely work, which sets them apart from the auto-tracing used on logos. That distinction matters, because no tool can truly convert a JPG to an embroidery file when the artwork is a flat logo. Photo tools are engineered specifically for tonal images, so the output here is real rather than a gimmick.
However, they share predictable weaknesses. Density often runs high, which stiffens fabric and can pucker lightweight garments. Colour matching drifts, since screen colours and thread colours never align exactly. Backgrounds get included when they should be removed. Above all, the software cannot judge whether a face still reads as that particular person, which is the only test that matters on a portrait.
For a framed keepsake on stable fabric, automatic output frequently succeeds. For a garment, for a client, or for a face that must be recognisable, manual refinement afterwards is usually the difference between good and disappointing.
Turning a Photo Into an Embroidery Pattern by Hand
If you stitch by hand, turning a photo into an embroidery pattern is simpler and the tools cost nothing.
Edit the photo as described above, then increase contrast heavily until it resembles a bold line drawing. Print it at the finished size. Next, choose a transfer method: tape the print to a bright window and trace with a water soluble pen, use a lightbox, or run it through iron on transfer paper for a faster result.
Then decide your palette before starting. Five to twelve thread shades handle most portraits, and restraint reads as artistic rather than incomplete. Long and short stitch blending creates tonal transitions that machine fills cannot easily match, which is exactly where hand work still wins.
Size, Fabric and Testing for Photo Embroidery
A photo embroidery pattern behaves differently from a logo, so three practical rules apply.
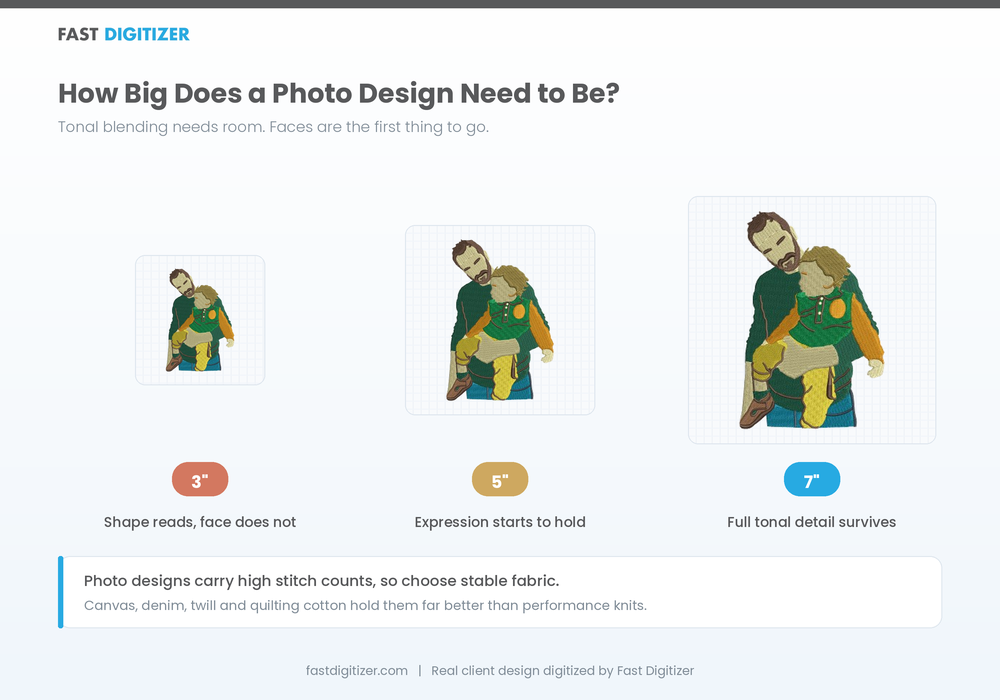
Go bigger than feels necessary. Tonal blending needs room. Faces below roughly three inches lose expression, and portraits generally start working properly around five inches and above.
Choose stable fabric. Photo designs carry high stitch counts, so canvas, denim, twill and quilting cotton hold them far better than performance knits.
Test before committing. Stitch on the same fabric with the same backing you plan to use. Screen previews hide puckering and density problems completely, and a photo design is exactly where those problems appear.
FAQs About Turning a Photo Into an Embroidery Pattern
How to convert a picture to an embroidery pattern?
To turn a photo into an embroidery pattern, crop it tightly, remove the background and raise contrast, then either run it through a PhotoStitch tool in embroidery software for machine work, or print and trace the outline for hand stitching. Finally, test stitch on scrap fabric before committing to the real piece.
What is the app that turns photos into embroidery patterns?
The mySewnet app includes a PhotoStitch feature that converts a photo taken on your phone into a design and sends it to a compatible machine or your cloud account. Most other photo tools sit inside desktop software rather than mobile apps.
How can I convert a picture to an embroidery pattern online for free?
Free online converters exist, although they generally auto-trace and rarely handle tonal images well. Ink/Stitch is free, open source and considerably more capable, while several paid programs offer trials including a thirty day option from Hatch and mySewnet.
How do I digitize an image for embroidery for free?
Install Inkscape, add the Ink/Stitch extension, import your prepared image, then assign stitch types manually and export in your machine format. Free software removes the licence cost rather than the learning curve, so expect several weeks of practice.
Do photo embroidery designs actually look like the photo?
They interpret rather than reproduce. Thread suggests tone through layered fills in a limited palette, so the result reads as artwork rather than a print. Strong contrast, a generous size and careful simplification bring it closest.
How much does photo digitizing cost?
Photo work costs more than a standard logo because of the tonal complexity involved. Simple logos generally run between $10 and $40 through most professional digitizing providers, whereas portraits sit above that range depending on size and the level of refinement needed.
Can I put a photo design on a t-shirt?
You can, although stitch count works against you. Photo designs are dense, so thin jersey may pucker or feel stiff. Heavier cotton, a jacket back, a tote bag or a framed piece all handle the density much more comfortably.
Getting the Embroidery Pattern You Pictured
The decision to turn a photo into an embroidery pattern rewards preparation more than software. Pick a high contrast image, crop it tightly, raise the contrast, choose a generous size, and accept that thread interprets rather than copies. Handle those five things and the finished piece looks like art rather than a compromise, which is exactly what a memory deserves.