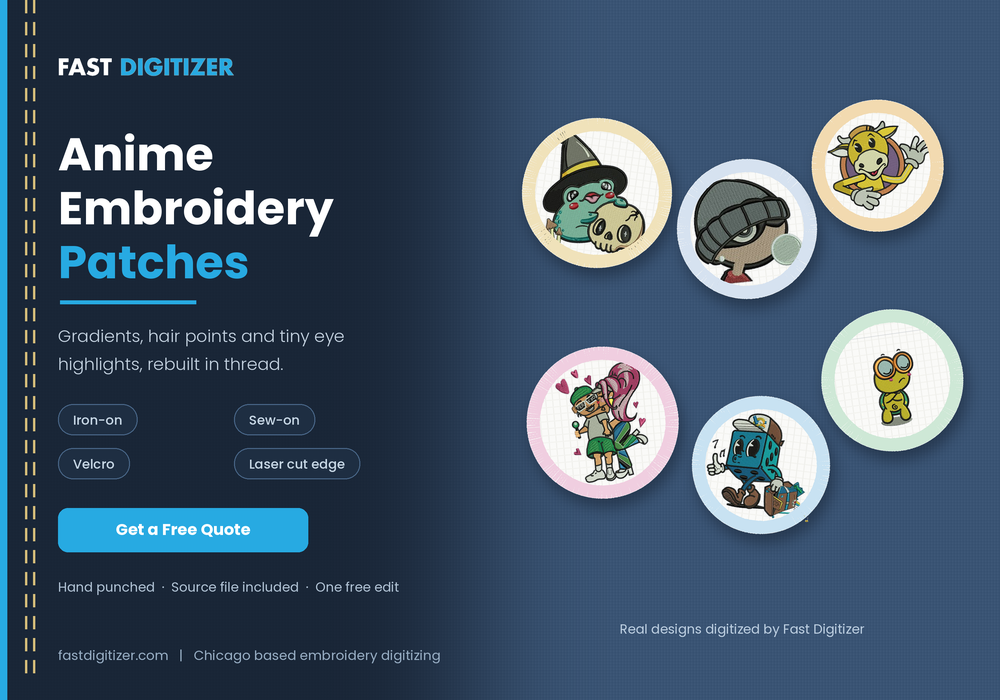
Anime embroidery patches look simple until someone tries to make one. The art style relies on smooth colour gradients, hair that ends in fine points, and eyes carrying three or four highlights inside a few millimetres. Thread does none of that naturally, so the gap between the reference image and a patch that actually stitches cleanly is wider here than in almost any other category.
What Makes Anime Embroidery Patches Harder Than They Look
A patch is a small canvas. Most anime embroidery patches sit between two and four inches wide, and every design element competes for that space. Anime artwork was drawn for screens where a character’s eye can carry a soft gradient, a white catchlight, and a dark outline all at once. On fabric, each of those becomes a separate stitched shape with its own minimum size.
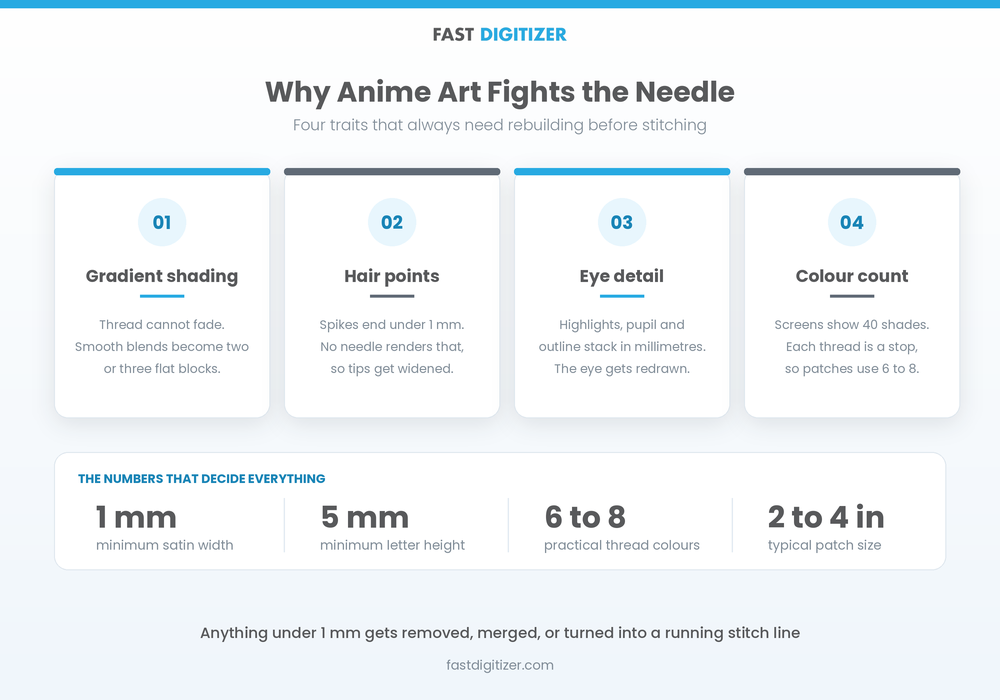
Four specific traits cause the most trouble.
- Gradient shading. Thread cannot fade. Therefore smooth colour transitions become two or three flat blocks, or a blended fill that costs extra thread changes.
- Hair points. Spiked hair ends in shapes narrower than a millimetre, which no needle can render. Consequently, those tips need widening or merging.
- Eye detail. Highlights, pupils and outlines stack inside a tiny area, so a digitizer normally redraws the whole eye at a workable scale.
- Colour count. A screenshot may contain forty shades. Since every extra thread means another machine stop, most patches simplify down to six or eight.
How Anime Embroidery Patches Are Built
Anime embroidery patches are built from four layers, and each one affects how the finished piece looks and lasts.
The base fabric. Twill is standard because it holds dense stitching without distorting, while felt gives a softer, retro feel. Your base colour matters, since any area left unstitched shows through as part of the design.
The embroidery. Satin stitches handle outlines and lettering, fill stitches cover larger colour areas, and running stitches carry fine detail. Digitizers usually describe coverage as a percentage, and full coverage means the base fabric disappears entirely.
The edge. This finishes the patch and stops fraying, and the choice matters far more than most buyers expect.
The backing. This decides how the patch attaches and how it survives washing.
Edge Options for Anime Embroidery Patches: Merrowed or Laser Cut
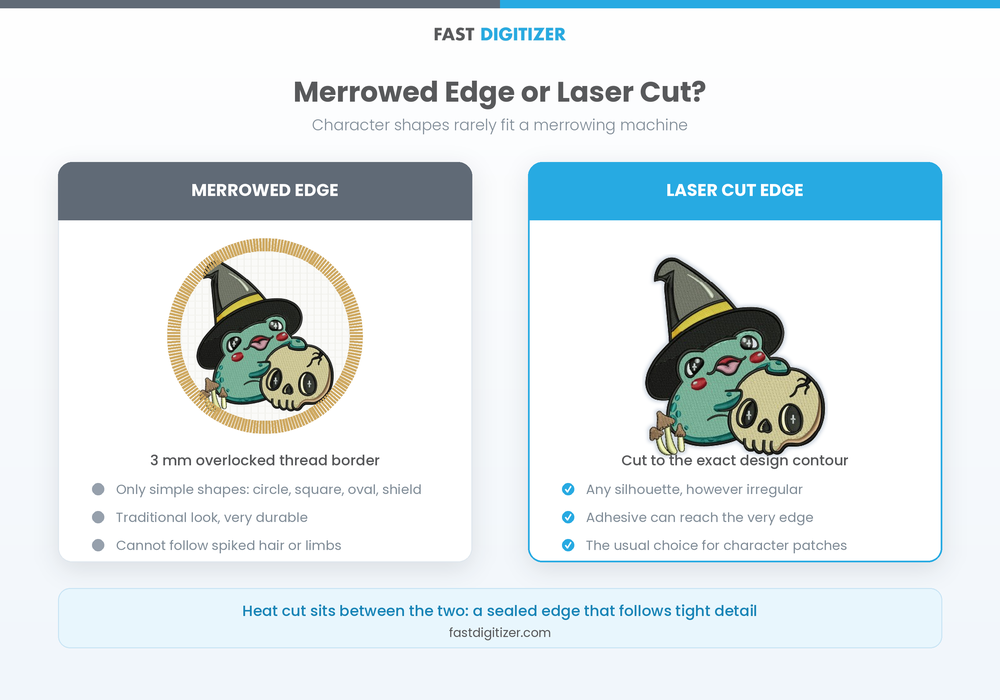
This single choice decides whether your character keeps its silhouette. Firstly, a merrowed border is an overlocked thread edge, roughly three millimetres thick, that wraps around the patch. It looks traditional and adds real durability. However, it only works on simple outlines such as circles, squares, rectangles, ovals and basic shields.
Anime characters rarely have simple outlines. Spiked hair, flowing capes and outstretched limbs create irregular shapes that a merrowing machine cannot follow. Consequently, most anime embroidery patches use a heat cut or laser cut edge instead.
Meanwhile, heat cutting uses a heated blade that seals the fabric as it cuts, producing sharp edges that follow tight detail. Laser cutting goes further and traces the exact contour of the design with no border stitching at all. Both allow complex silhouettes, and laser cut edges pair well with iron-on backing because the adhesive can extend right to the edge.
Backing Options for Anime Embroidery Patches
Four backings cover almost every use, and the right one depends on what the patch attaches to.
Iron-on carries a heat activated adhesive that bonds with a household iron or heat press. Typically it suits denim jackets, bags and flat cap panels. Because the adhesive layer stiffens the patch, it holds its shape well, although results vary on synthetic blends.
Sew-on has no backing layer at all, so the patch stays flexible and follows curves. This is the most permanent option and the best choice for anything washed frequently.
Velcro uses hook and loop, so patches swap out in seconds. Tactical and morale patch collectors prefer it, and it extends patch life because you remove the patch before laundering.
Finally, adhesive peel and stick suits temporary placement, displays and events. It works on smooth surfaces where sewing and ironing are impractical.
Sizing Anime Embroidery Patches: What Detail Survives
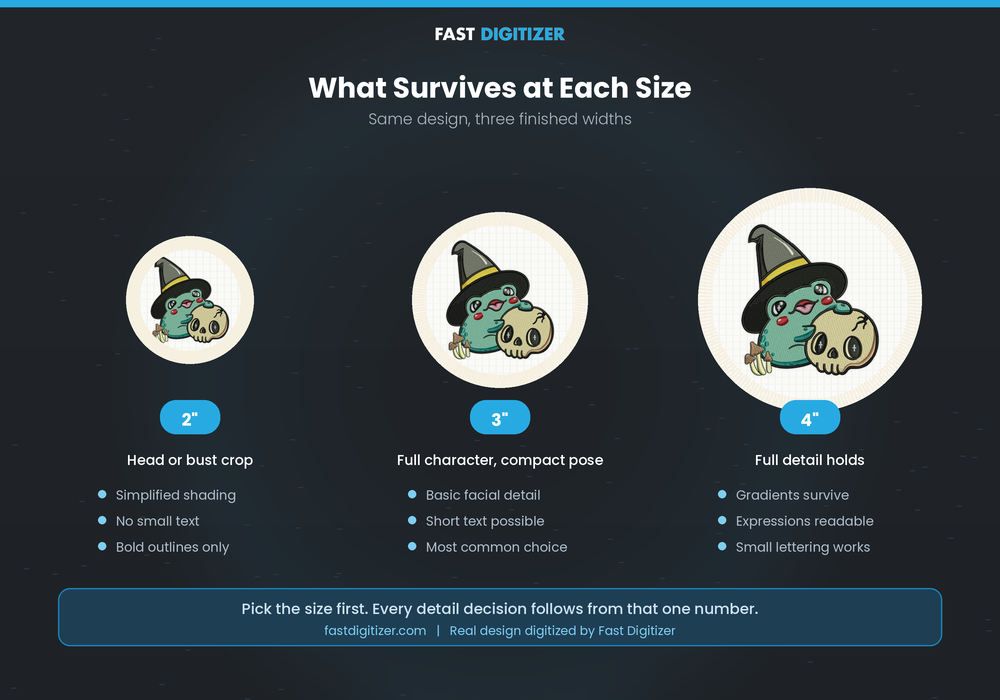
Size determines how much of the original artwork you keep. Most anime embroidery patches land between two and four inches, and the difference between those numbers is dramatic.
For instance, at two inches you get a head or bust crop with simplified shading and no small text. At three inches, a full character works if the pose is compact, though facial detail stays basic. At four inches and above, you can hold gradients, expressions and small lettering, since satin columns finally have room to sit above the one millimetre minimum.
Above all, one practical rule helps here. Anything that measures under one millimetre in the finished patch either gets removed, merged into a neighbouring shape, or converted to a running stitch line. Deciding that early beats discovering it after production.
The Copyright Question Nobody Answers Honestly
Most guides on anime embroidery patches skip this entirely, which does readers no favours. Anime characters are protected by copyright, and that protection belongs to the studio or publisher rather than to the fan community.
In practice, reproducing a recognisable character on a patch you sell requires a licence, and licensing for anime properties is expensive and rarely granted to small sellers. Marketplaces act on takedown notices routinely, so shops built on unlicensed character patches tend to disappear rather than scale.
However, personal use sits in a softer area. Making a single patch of a favourite character for your own jacket attracts almost no attention in practice, although it is not automatically permitted either. The risk climbs sharply the moment money changes hands or the design appears in an online store.
How to Order Anime Embroidery Patches
Ordering anime embroidery patches runs in a predictable order, and getting the first two steps right prevents most disappointments.
1. Prepare the artwork. Send the highest resolution image you have. Vector artwork works best, although a sharp PNG is usable when the shapes read clearly.
2. Decide the finished size. Next, give measurements in inches rather than pixels, since everything from linework to lettering depends on this number.
3. Approve the simplification. Your digitizer will reduce the colour count and rework fine details. Reviewing that plan before stitching saves a rebuild later.
4. Choose edge and backing. Laser cut suits irregular character shapes, while merrowed suits simple geometric ones. Then pick iron-on, sew-on, Velcro or adhesive.
5. Check a sewout. Finally, ask to see the design stitched on real fabric before committing to a production run.
Frequently Asked Questions
Are anime patches iron-on or sew-on?
Both exist, so you choose at order time. Iron-on applies fastest and suits denim, bags and flat panels, while sew-on lasts longer and stays flexible on frequently washed items. Velcro is a third option if you want to swap patches between jackets.
Can I make my own embroidery patches?
Yes, as long as you have an embroidery machine and digitizing software. Stitch the design onto twill with a stabiliser, then finish the edge with a satin border or by heat sealing the cut edge. The digitizing itself is the hard part rather than the stitching.
How long do embroidery patches last?
A well made patch outlives the garment it sits on. Sew-on patches survive years of washing, whereas iron-on adhesive can weaken over repeated hot washes, which is why many people iron a patch on and then stitch around it as well.
What is the difference between embroidery and patches?
Direct embroidery stitches onto the garment itself, so it cannot be removed or moved. A patch is stitched onto its own fabric base first, then attached afterwards. Patches therefore transfer between garments, suit small production runs, and avoid the risk of ruining an expensive item.
How much do anime embroidery patches cost?
Two costs exist. Firstly, digitizing is a one time charge for creating the stitch file, and it typically runs between $10 and $40 depending on complexity. Patch production is then priced per unit, dropping sharply with quantity, so single patches cost far more each than an order of a hundred.
What size should an anime patch be?
Generally, three inches suits most jacket and bag placements. Choose two inches only for a head or bust crop, and four inches or larger when you need facial expression, shading detail or readable text to survive.
Can a photo or screenshot be turned into a patch?
It needs digitizing rather than converting, and a screenshot makes that harder because compression blurs the linework. Clean vector artwork produces a noticeably better patch, so redrawing the design first is usually worth the effort.
Getting It Right the First Time
Good anime embroidery patches come from decisions made before the machine starts. Pick a size that fits the detail you care about, accept that gradients become flat colour blocks, choose a laser cut edge for irregular character shapes, and build around original artwork so the design stays yours. Handle those four points and the stitching itself is the easy part.